How to invoice for Owner Operators
So you just became an Owner Operator and completed your first load, your probably wondering, how do I get my money? In order to get paid you have to send the company you worked with something called an Invoice. An Invoice is a document that you send after completing a service, in this case, the load. Your invoice states payment terms, service description and more. Well now your probably wondering how to make an invoice, to make an invoice I recommend using a service like quickbooks. Quickbooks can create invoices, but also track other aspects of your business. Using a system that can make invoices, but also track all of your accounting is ideal.
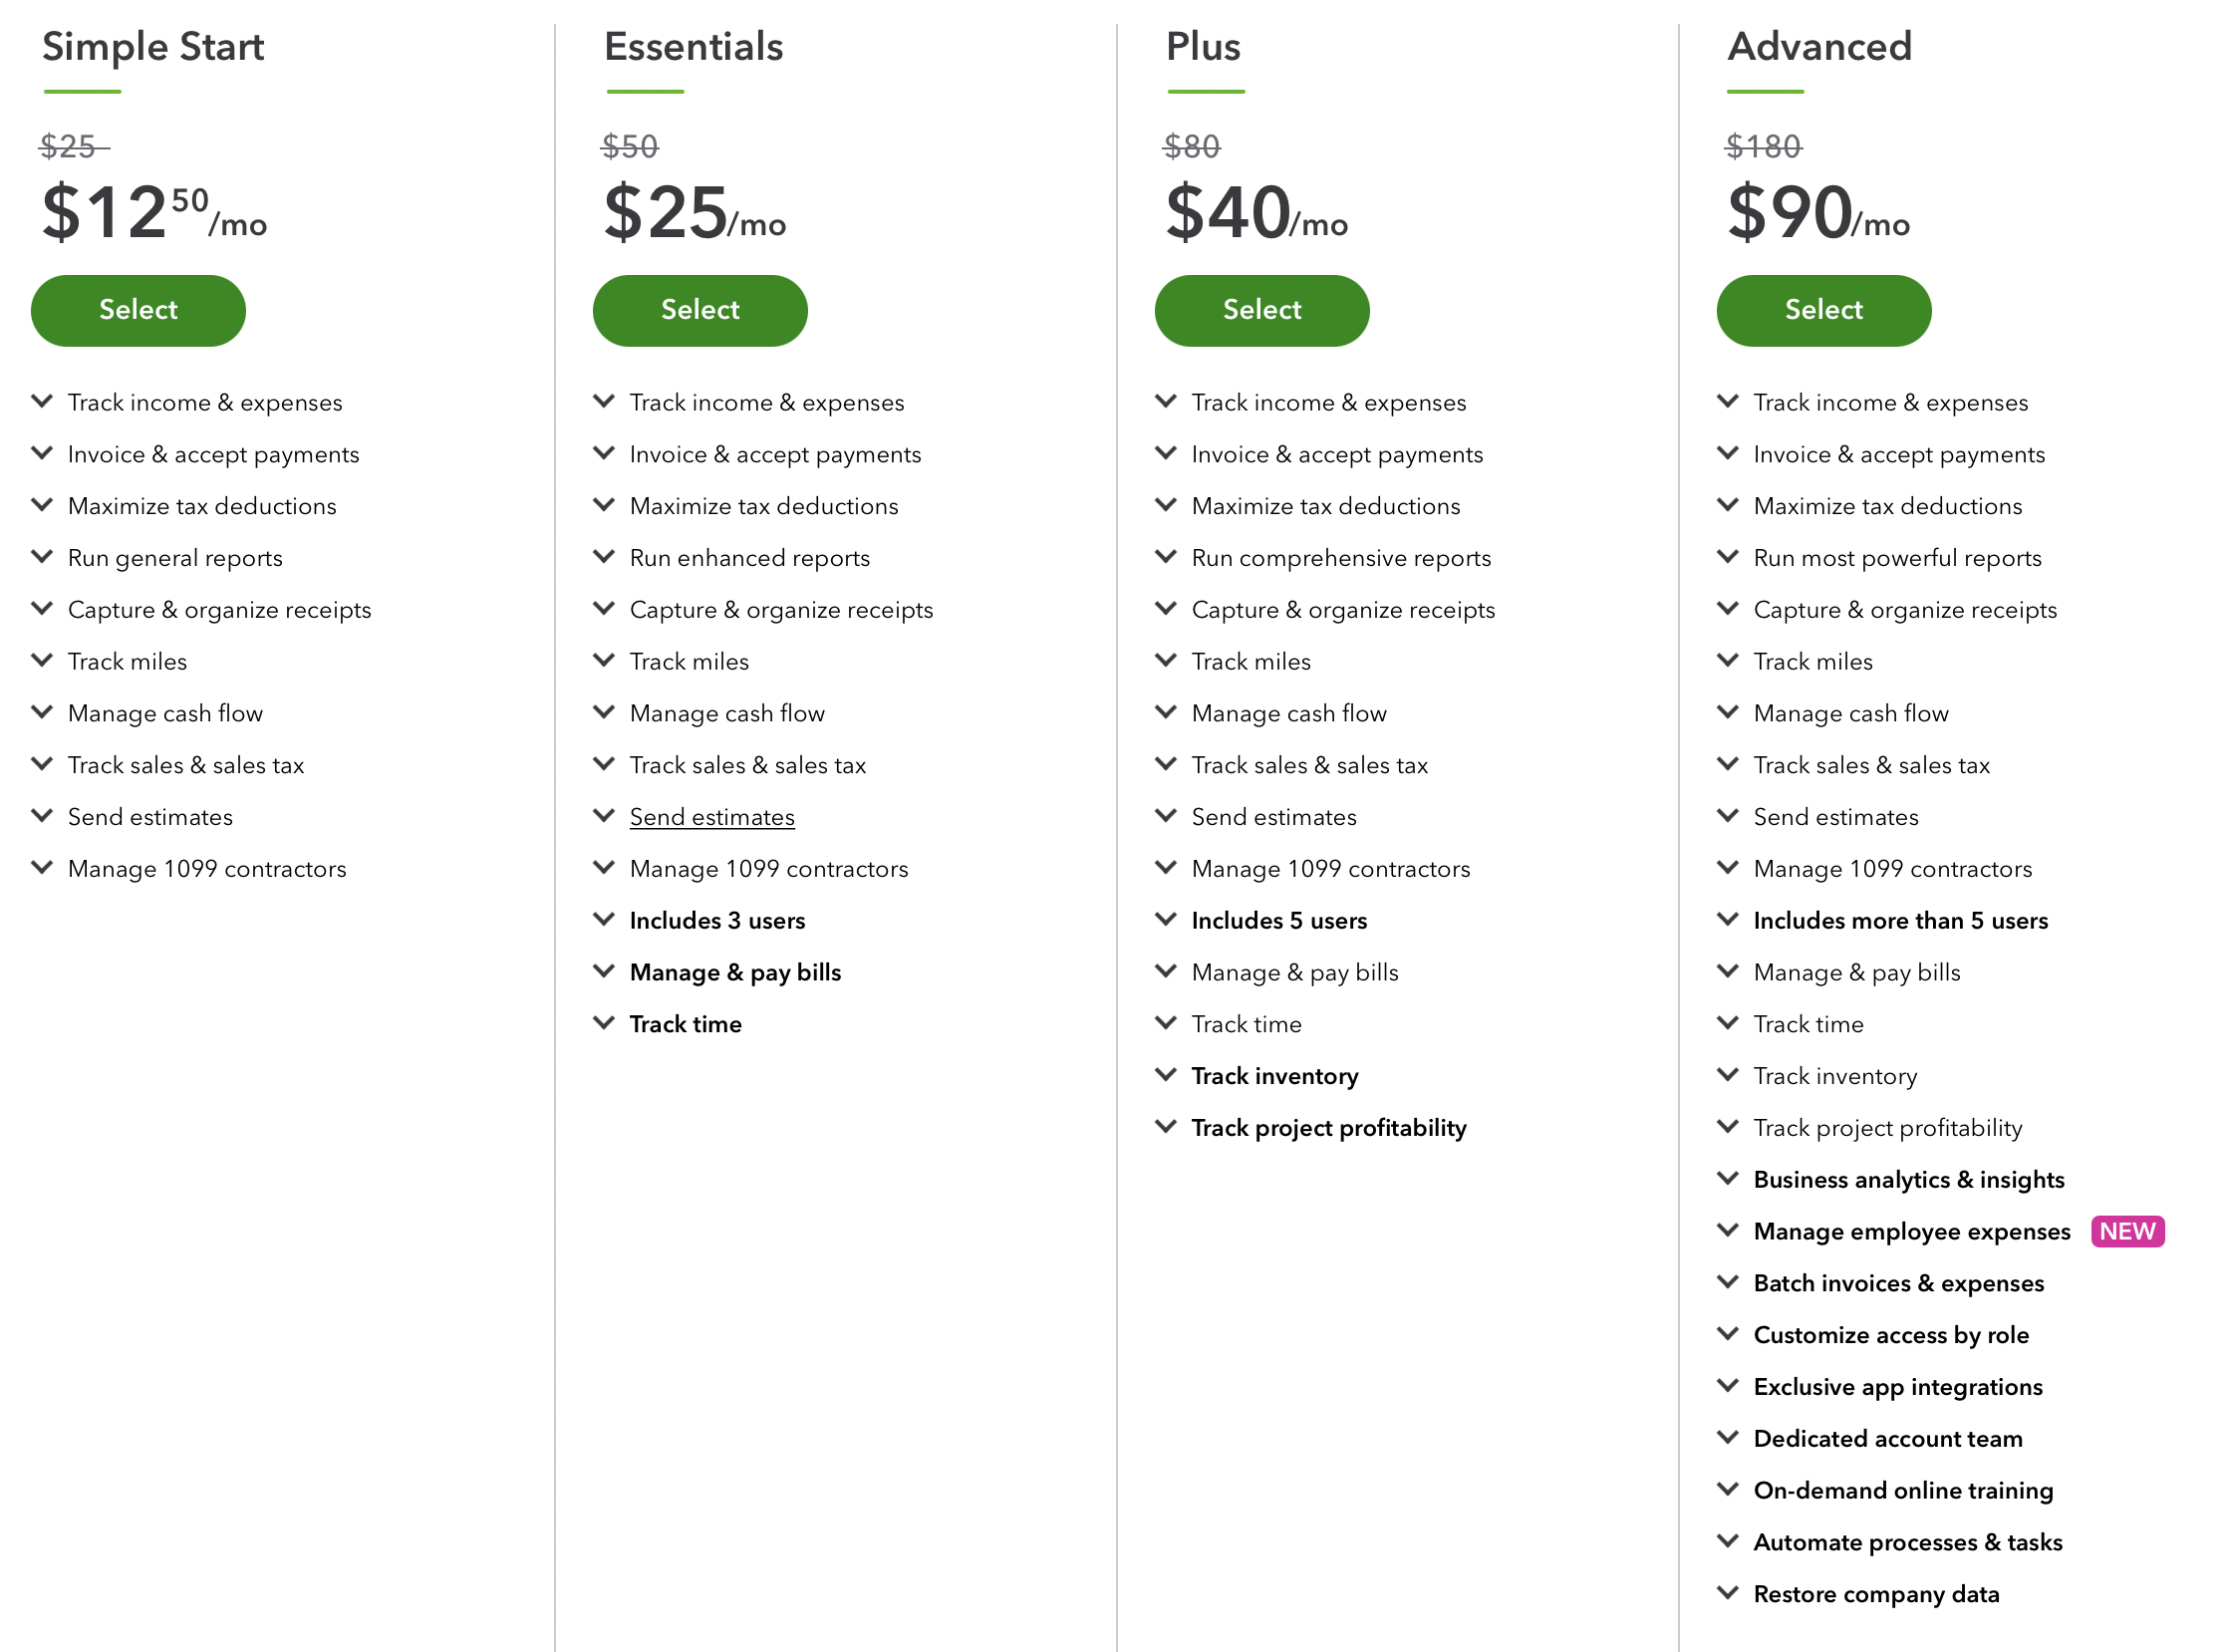
Before you start invoicing you need to purchase a plan.
We recommend the simple plan for beginners, so that you can get a feel for quickbooks and start learning how to use it. You can update your plan as you go, but starting with the simplest plan will be a really good start.
When choosing a plan keep in mind, how big your team is, if you will need access from different devices, and your budget.
Quickbooks online is accessible from different devices, and desktop is only for one device.
After purchasing a plan you can continue.
So how do I create an invoice using quickbooks?
Step 1:
To get started you are going to want to set up your customer in the system. You can do this by visiting Sales> Customers> New Customer.
Your Customer set up page should look like this. You are going to want to add Company name, Billing address, Email, Phone number. Once your customer is set up you are ready to invoice.
If you are factoring, first your going to want to add your factoring company as a customer, using all according information, once the factoring company is set up in your system, you can add them as a sub customer to any brokers you want to use factoring with.
Step 2:
Next you need to gather all of the information needed to invoice such as your rate confirmation, bill of lading and proof of delivery and any other documents, such as weight receipts or bridge tolls. Don’t write on your proof of delivery and make sure all parties involved sign.
Don’t write the price on the proof of delivery, the price should only be on your company invoice that is going directly to your customer that gave you the load.
Step 3:
You’re going to want to scan these documents. If you dont have access to a scanner, you can use your phone with adobe scan, cam scanner, or any app that creates PDF scans.
Next your going to want to add the scanned pages into a PDF packet. You can use Adobe Acrobat to create this file. Leave it open for the time being, you will need to add the finalized invoice later. It is very important to make sure these documents are in a packet because this will make it easier for all parties to find and organize all of the important documents.
Step 4:
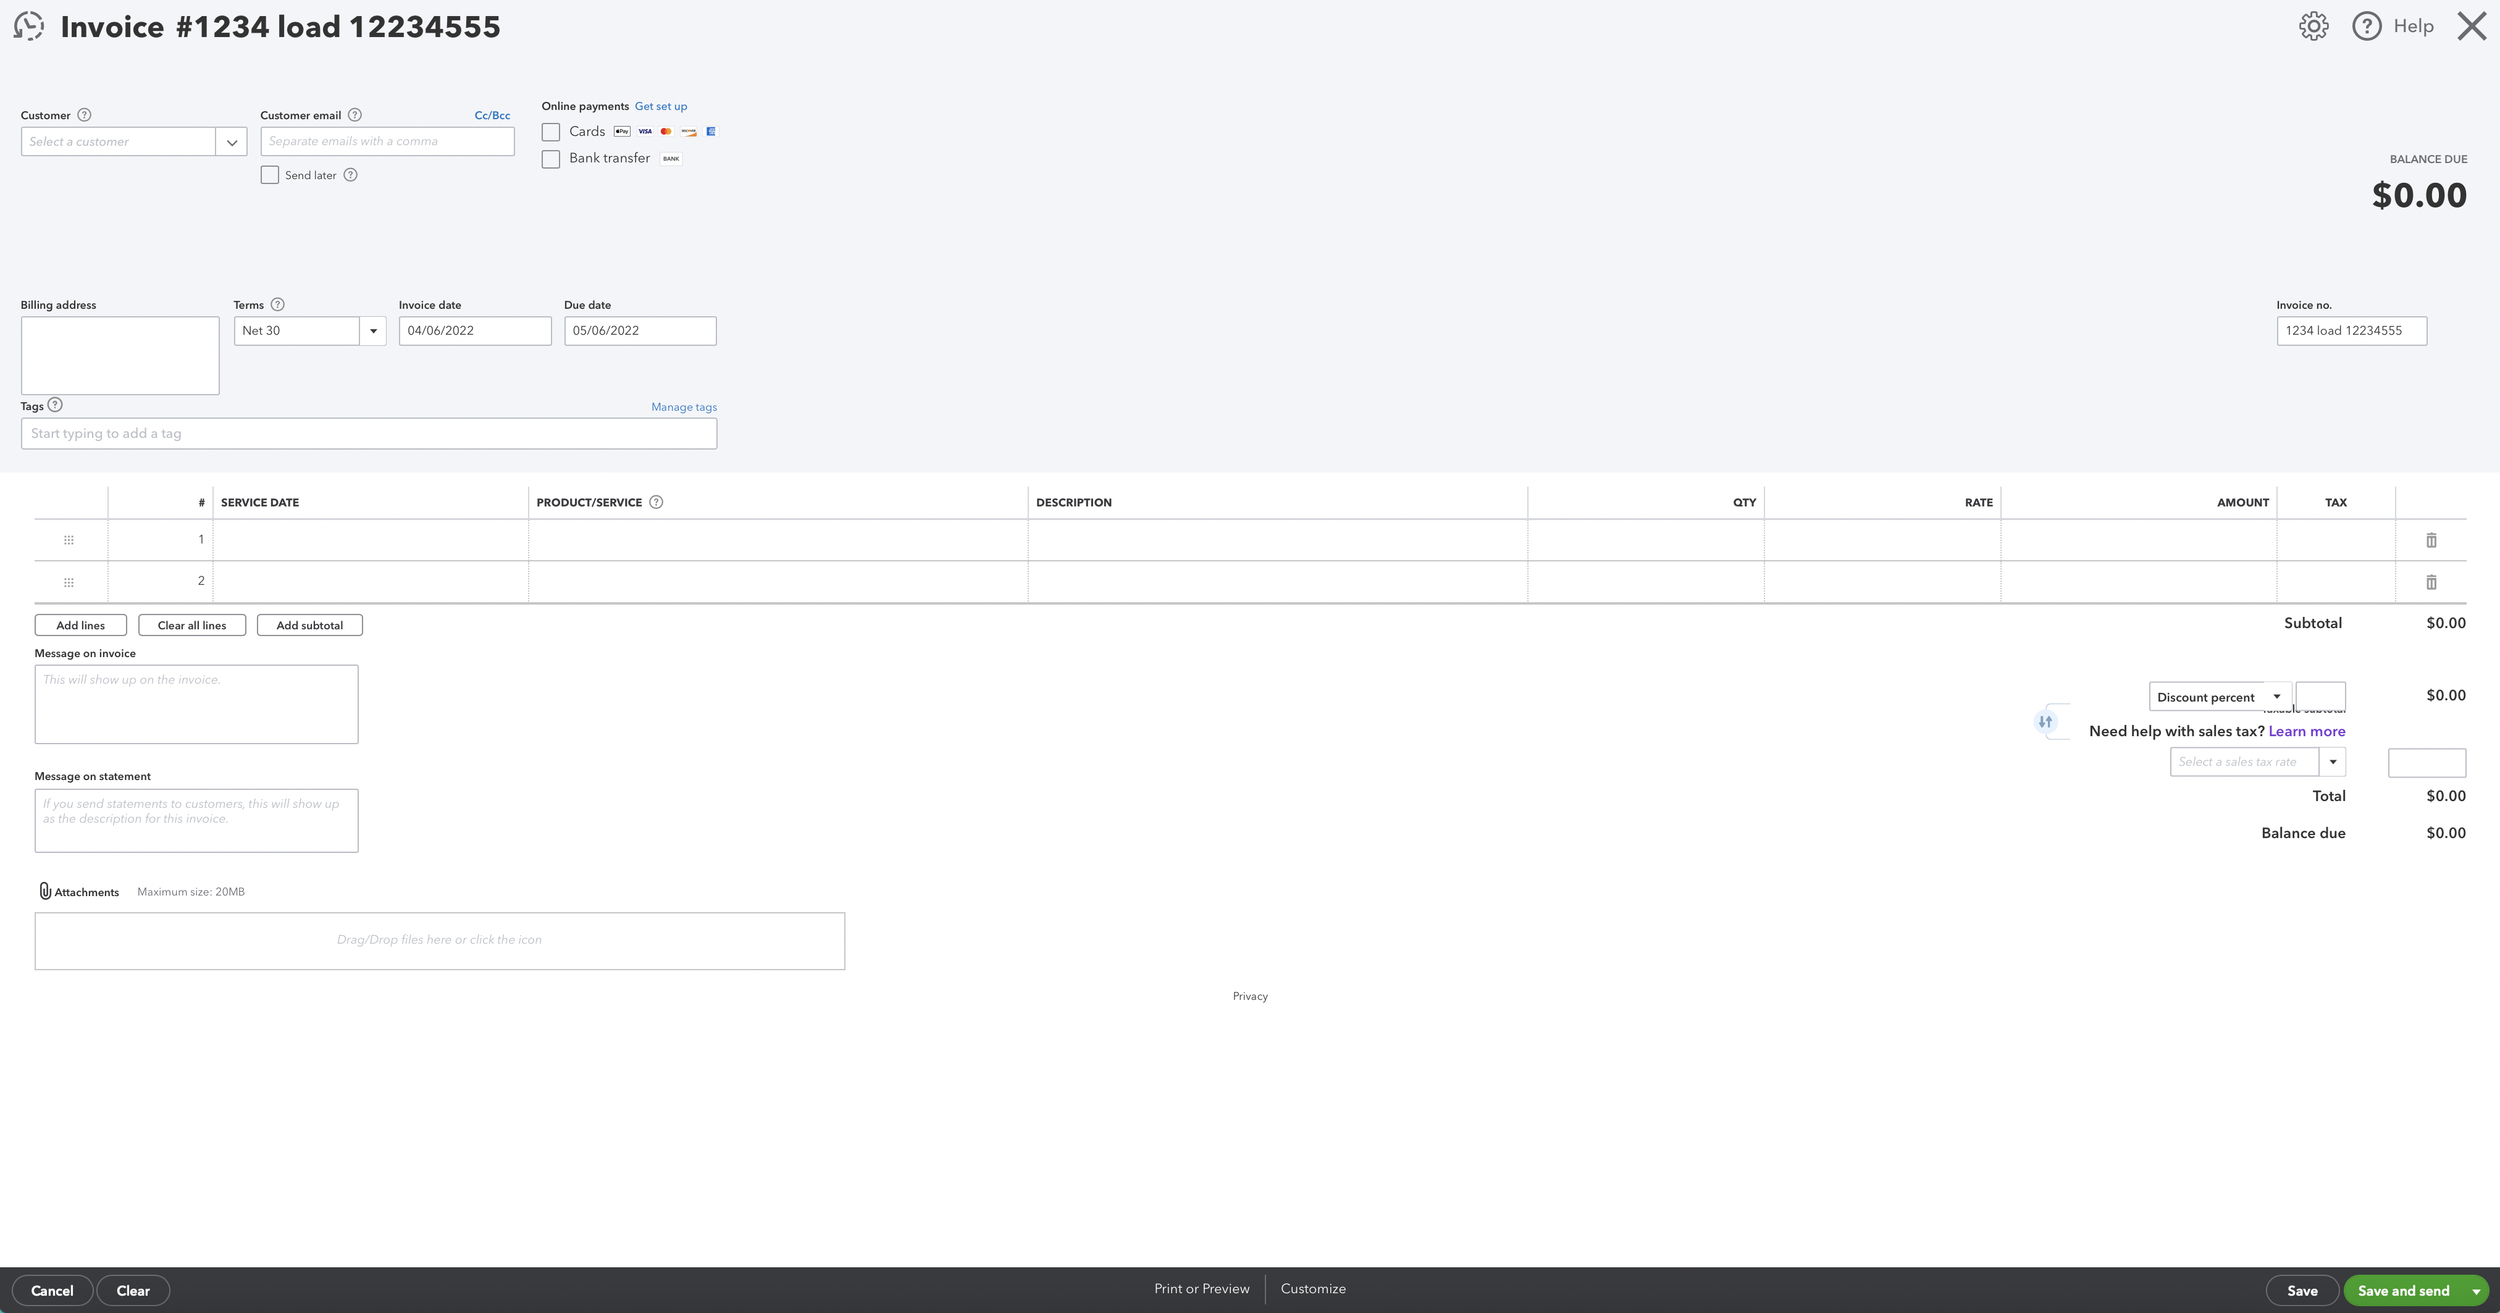
Once you open your Invoice, make sure you enter your invoice number and your brokers load number. Usually there is only one box to enter this information, this is how we recommend to enter the information, invoice #, load #. This will make your life easier when you have to search for either the load or invoice number in the future.
Step 5:
Click on the word “ Invoice” to change the subject line. It’s important to Title the subject line with the load number and your invoice number. IE:(Broker Name) load 1234 (your company name) invoice 123, this makes it easier for you and your broker.
Enter your customer name in the top left corner, select their name in the customer box and the rest of the information will fill in itself. Double check your payments terms to make sure they are correct.
Adding tags to your invoices is useful for future reference. I reccomend you use tags like “Factored Loads” or “ Not Factored Loads”.
Step 6:
Next you want to add the date, service and the description. A good description would be the description of the load, such as where you picked up and dropped off .
Next add the rate. If you are using a factoring company or ACH add the appropriate fees in the second or third section. You may also want to add a message on your invoice, in the “Message on invoice” box you can include your MC number or DOT number and anything else important for your broker to know.
Step 7:
Now you are going to click on print or preview your invoice on the bottom of the invoicing page, from there you should double check all of your information and then click download. Now you’re gonna go back to the PDF file you created earlier and add the invoice to it.
I recommend making the Invoice the first page. This will make it easier to find in the future.
Step 8:
Save the pdf packet file and attach it using this box, after the file finishes uploading you need to click the attach to email box to ensure your broker receives all the correct information for you to receive payment.
Keeping track of your invoicing is so important because if you don’t know who owes you money, they could slip through the cracks and you could lose your money they owe you. Keeping a close eye on these things will ensure that you always get the hard earned money you deserve.
Quickbooks makes this easy, but I do recommend logging the loads you complete in another location such as a google sheet, you should also save your invoices to a google drive folder for easy access, and to keep them organized. You should log information such as, date, destinations, broker, amount owed to you, any fees, and payments you received. Keeping everything organized is crucial incase of any inconsistencies.


